Christmas Break: Sword Model
Over the christmas break, I wanted to do some models for various reasons. Mid-way through the creation of this model, I decided I should probably create a journal of the piece. I've also (re)created a custom lightsaber already, but I'll do a 'post-mortem' style blog post after finishing this sword model and post.
The reason for creating this model is so I can use it in a mod for Blade & Sorcery, a VR sword-fighting game that will soon have custom weapon modding support. I wanted to create a 'bastard sword' model so I could make it a custom weapon in the game and make use of it. I decided that for all models I create over the holidays, I would make them in Maya rather than the program I'm used to, 3DS Max, as that's the program used in the university course.
Sword References
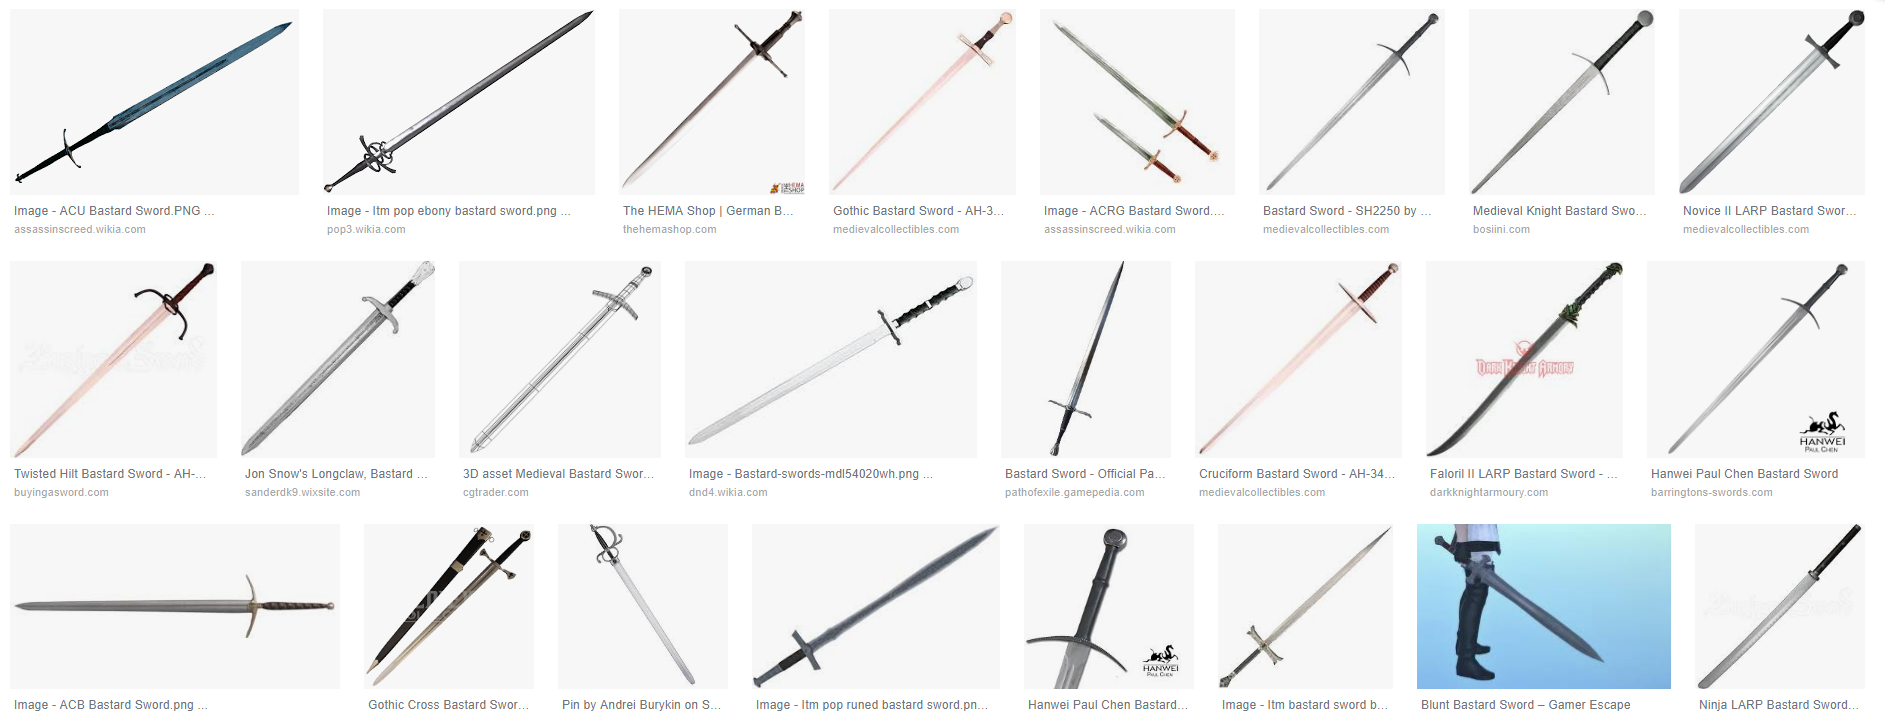
Before I started working on the model, I needed some references - ideally for proportion sizes. This is because I want to create a very specific kind of sword - a sword is referred to as a Longsword, Bastard sword or Hand-and-a-half sword, depending on the person you ask. This is the type of sword that's smaller and lighter than a Greatsword/Claymore, but bigger than a traditional one handed sword. The sword can be used with one or two hands effectively, and is often used in fantasy film as the most common type of sword.
I gathered multiple references - the first one I needed was a picture of a sword from top down aligned vertically. This was so I could place a flat plane underneath the model and use it as a reference for proportions. This, and a page of google images of swords for reference, I used this as a basis for my sword.


The reason for creating this model is so I can use it in a mod for Blade & Sorcery, a VR sword-fighting game that will soon have custom weapon modding support. I wanted to create a 'bastard sword' model so I could make it a custom weapon in the game and make use of it. I decided that for all models I create over the holidays, I would make them in Maya rather than the program I'm used to, 3DS Max, as that's the program used in the university course.
Sword References
Before I started working on the model, I needed some references - ideally for proportion sizes. This is because I want to create a very specific kind of sword - a sword is referred to as a Longsword, Bastard sword or Hand-and-a-half sword, depending on the person you ask. This is the type of sword that's smaller and lighter than a Greatsword/Claymore, but bigger than a traditional one handed sword. The sword can be used with one or two hands effectively, and is often used in fantasy film as the most common type of sword.
I gathered multiple references - the first one I needed was a picture of a sword from top down aligned vertically. This was so I could place a flat plane underneath the model and use it as a reference for proportions. This, and a page of google images of swords for reference, I used this as a basis for my sword.

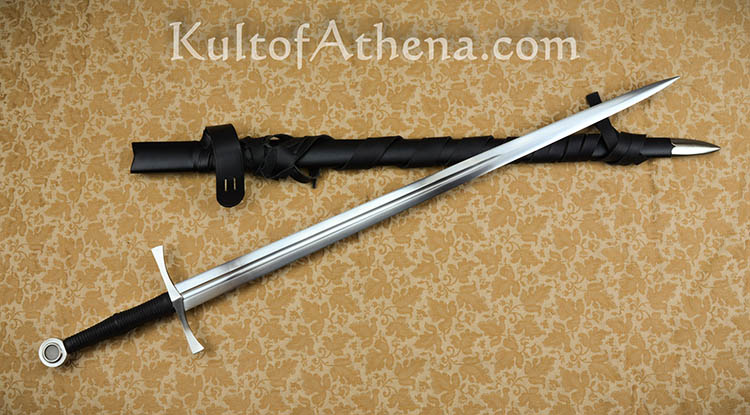
However, while creating the hilt, I realised I wasn't sure what type of hilt I wanted to create. I knew that I wanted it to be a straight hilt, not curved like some designs, but I wasn't sure how it would 'connect' to the blade itself. After looking at some images of sword hilts, I found this image, which I would use for inspiration of how the hilt connects to the blade.

I will likely use more references in the future, but the image above is definitely the kind of hilt/grip that I'd like to create. I do, however, have a very specific idea for what blade I want to create.
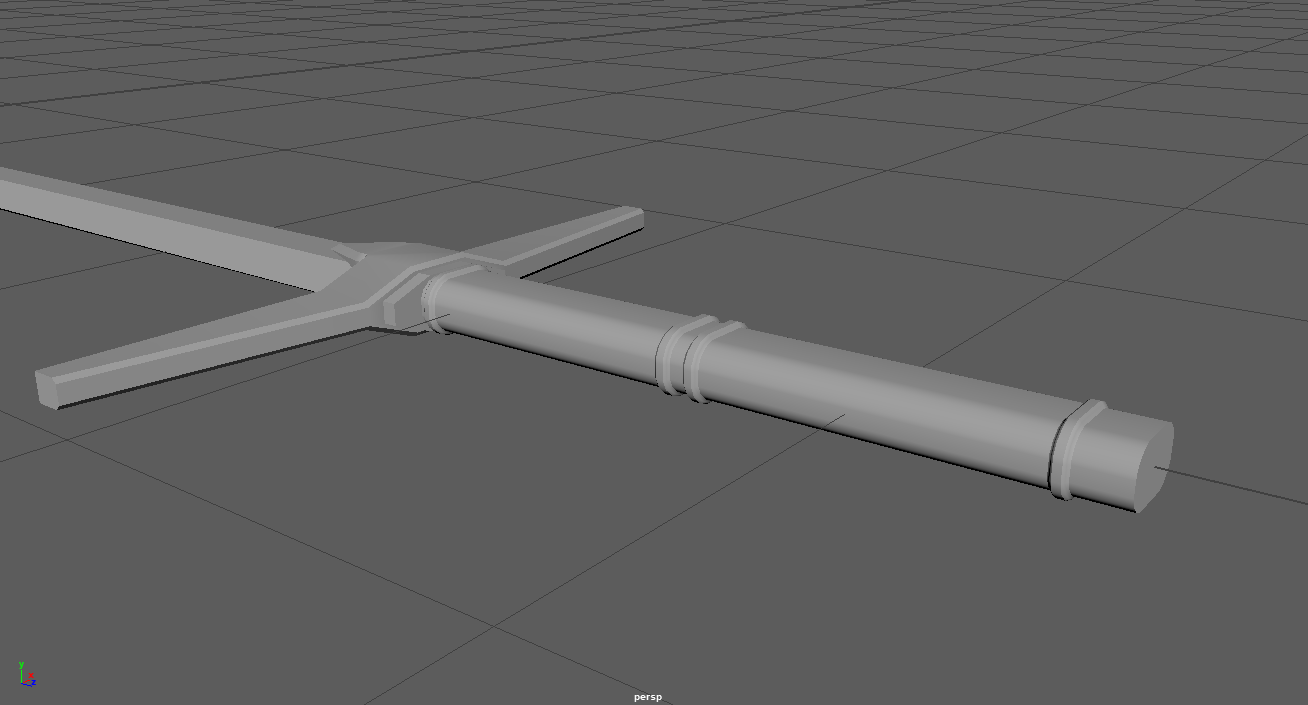
The Model
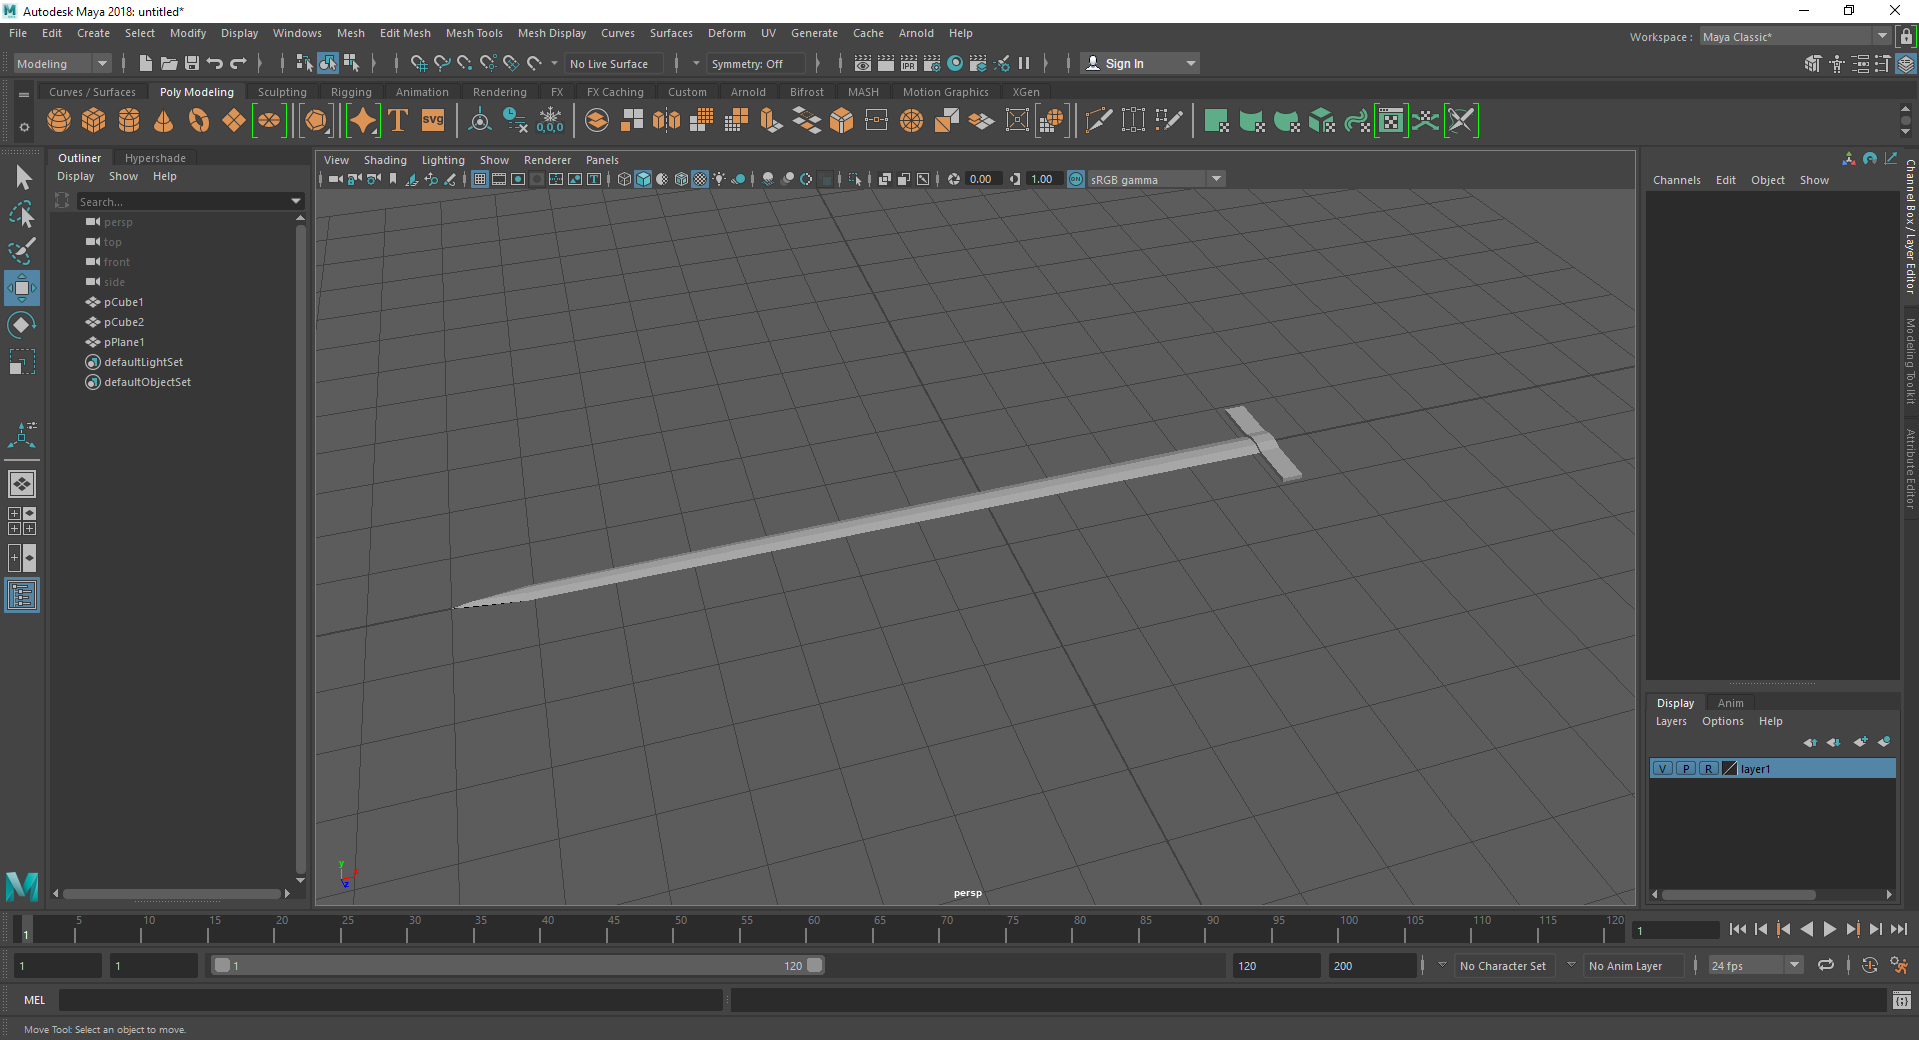
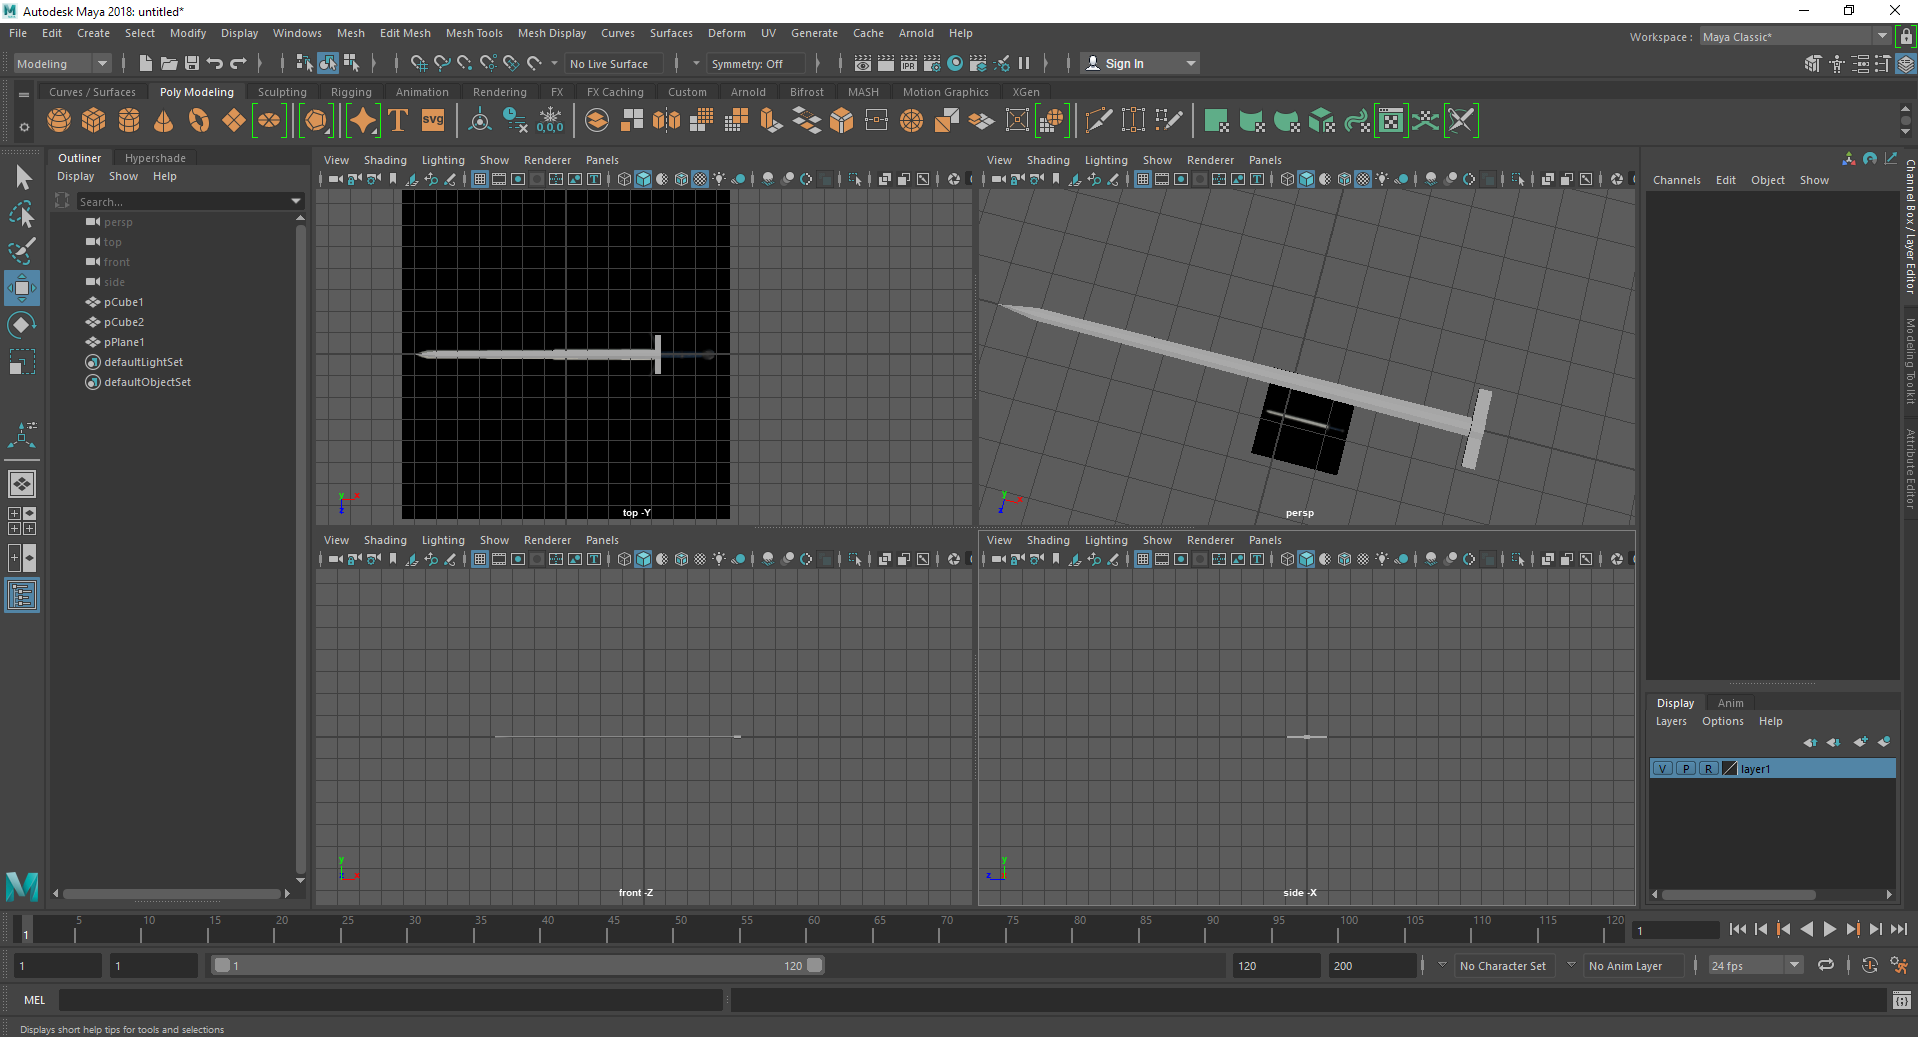
I thought it'd be good to post where I was at when I decided to create a blog post out of this, which is rather early in the model. I have created the basic shape of the blade and started working on the hilt, but I have left out the handle to create later. The blade itself is my preferred shape of blade, known as the XVIa sword type in Oakeshott's typology. I'm not sure what lead to this preference, but it's definitely the sword I go for in any game that has a similar sword design.
You may note that I've made use of a later in the bottom left, which I created (after some research) to create the proportional reference for use in a top down view. I created a new lambert material in Hypershade and imported the texture (through dragging and dopping the image into the node/graph editor of the texture, which may not be the best method but it does work) and applied it to a flat plane which I but far below the model.
I should probably point out that while creating this, I'm still learning Maya. I'll be making extensive use of google to learn things (like making use of layers to create a textured plane that I can't select) throughout the piece, and may not mention them beyond here by accident. Anything that hasn't been covered in our tutored classes before christmas break is what I've learnt through google and research.
Now, I believe that I've caught up to where I am at when I started writing this journal. From now, I will be trying to create a hilt design that I am happy with, and will mostly be going by feel and experimentation (which is how I go about things without prior planning like concept art). Usually it turns out okay.
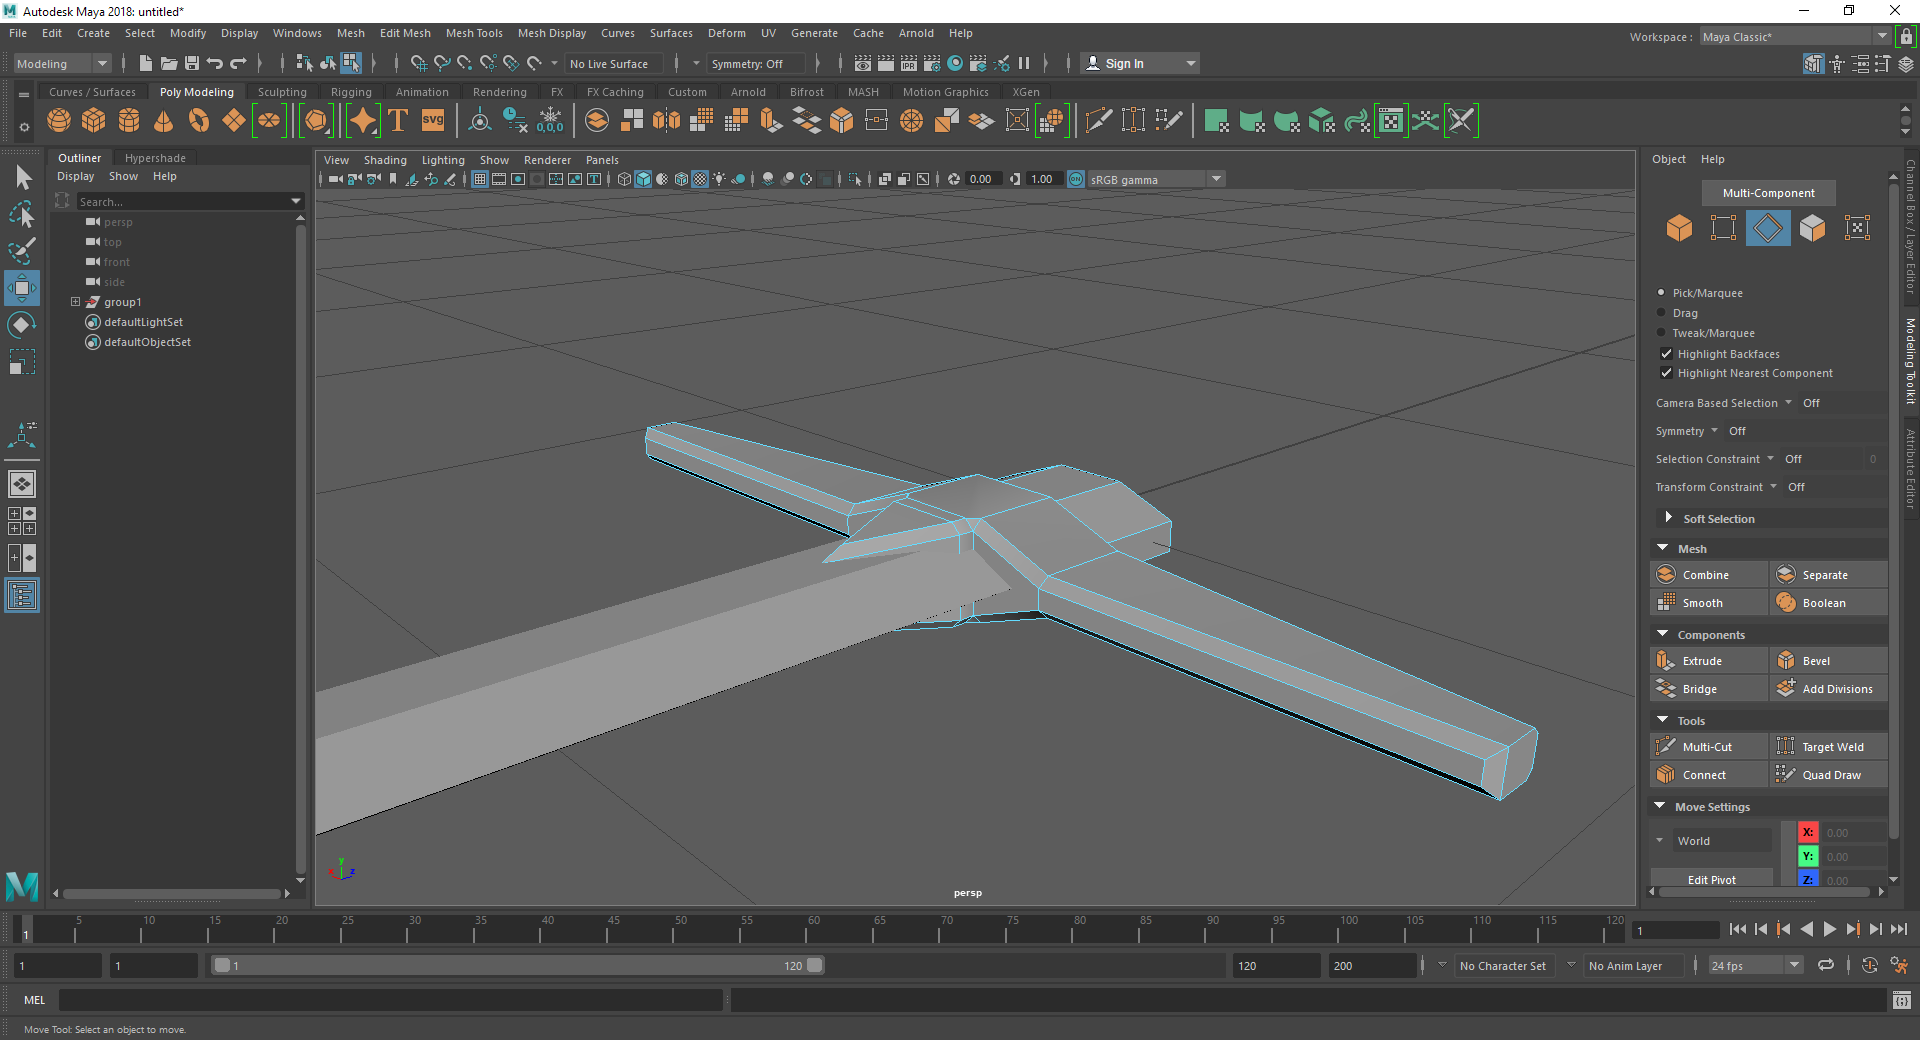
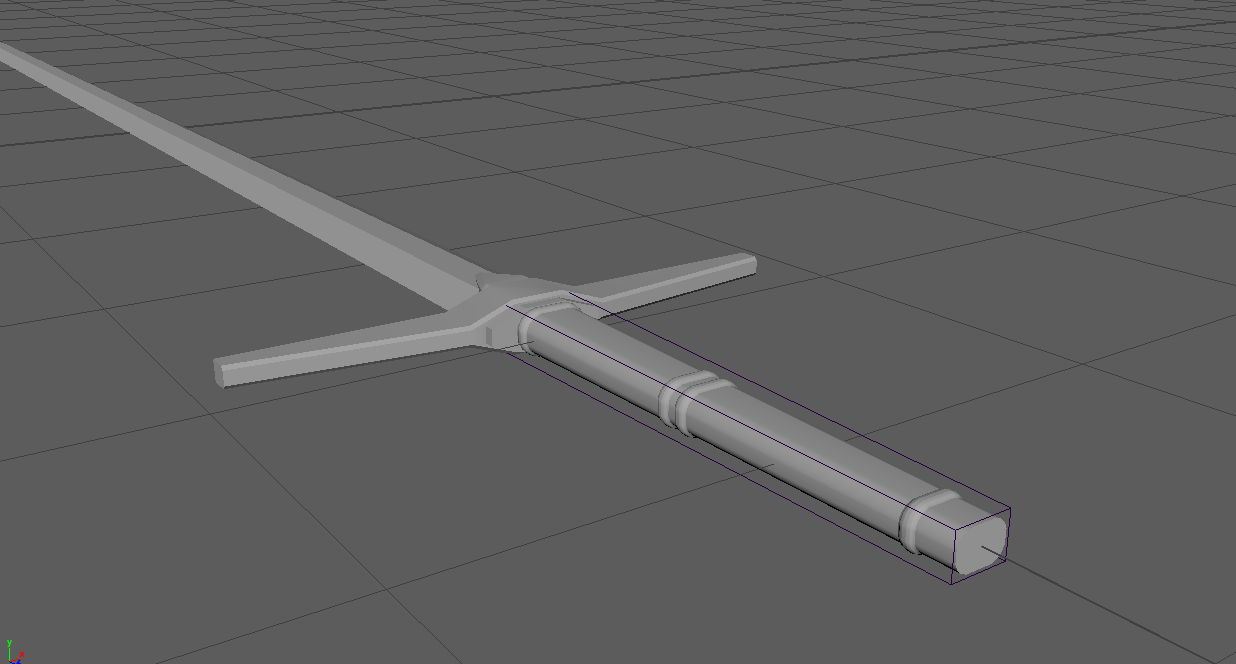
After playing around with the hilt for a while, this is what I ended up with for now. One thing I've always liked about the fantasy swords is a spike of metale coming form the hilt to the blade, implying the blade is firmly connected to the hilt. I also went with tapered edges and a block of metal which would connect to the grip - however, this block connecting to the grip may not stay, as it depends on how the grip itself ends up, which is what I'm going to move on to now. I'm planning on roughly copying the hilt reference used above, as it's exactly the type of grip I like the look of. It will likely end up slightly different to the image, but that's probably a good thing.
While working on the hilt, I realised something. A complaint I have about Maya - I personally don't like how you have to do a lot of things by eye. From the tools I can see, it's hard to be mechanically precise about things. On the hilt, for example, I had to make the cuts for the bumps along the hilt by eye. I couldn't select where I make a cut through inputting XYZ co-ordinates. This is something I'm used to with 3DS MAX, where you have a 'slice plane' which gives you a flat plane to move along and define where you cut through an object; being able to move this plane like you would any other object (through XYZ coordinates), is something I can't find easily on Maya. If this tool exists, I have no complaints, I just didn't know about it, but I really do hope that Maya has things to let me be as precise as I am about measurements in it.
I know, it's a little off topic, but this is just something that came to mind while making the grip. Speaking of, from the image above I'm going to 'spread out' the bevel I've put on the bumps in the hilt by selecting them with the vertex tool and using the scale tool. Then I'm going to define the overall shape using the lattice modifier; grips are usually thicker at the hilt than they are at the pommel, so I'll do that at the end rather than the beginning to cause less issues with creating the model.
Oh! I also looked at more images, specifically of grips. Most grips aren't circular for these types of swords, so I decided to co with a bevelled square by using the bevel modifier twice on a rectangle. I could go with a circular or oval grip, but I feel a bevelled square fits the design of the sword more due to the similar nature of the blade and hilt. That, and I prefer the shape in general.
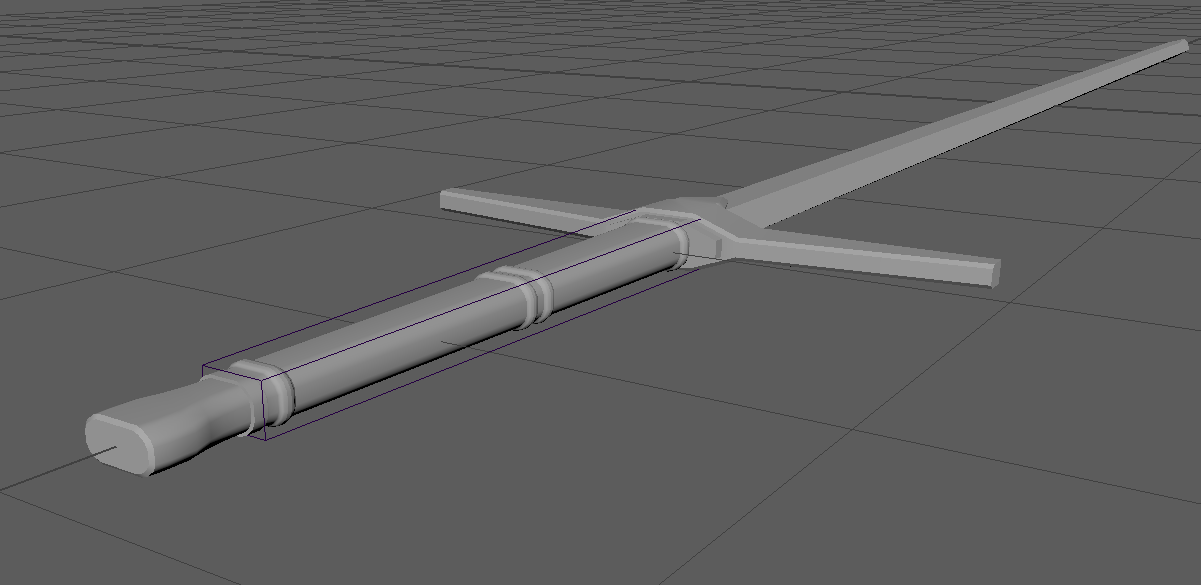
The sword is coming along! There's only one element left before I can consider it a proper sword, but even then the model won't be finished. The blade itself isn't as detailed as I'd like it to be (it's actually missing an important part that would make it an XVIa sword), but for now there's one thing I need to do, the pommel. This is actually the part of the sword I'm most unsure about - in fact, that's consistent with any sword design, because I have the same issue with lightsabers. Anyway! I'm just going to look up pictures of pommels and wing it as I have been with most of the model.
We have a pommel! I decided to go with a rather simple shape, one that implies a 'rat tail' tang. The 'tang' of a sword is the part of metal from the blade that passes through the hilt and grip of the sword, helping the sword's sturdiness and durability by making it harder for the hilt and grip to detach from the blade. A 'rat tail' tang is when the tang is far smaller than the size of the blade itself, shown in the diagram here with a knife along with the looks of a full tang and partial tang. The pommel itself is actually separate from the blade, and attached to the tang usually through a screw style hole in the pommel or welding (Fun fact! It's theorised that medieval sword users used to detach the pommel of their swords and throw it at their opponent, this is known as 'Ending him rightly'). The fact that my pommel has an extrusion where it connects to the grip indicates this, showing the type of sword that it is! I'm not sure if the type XVIa sword has a certain type of tang and pommel attachment, but the whole system is defined by the general shape and appearance, not the construction.
So, I just mentioned the XVIa type. There's one particular thing about the blade in the diagram, an indent within the centre of the blade itself! In the picture below, you can see this clearly. This is a defining feature of the XVIa sword, so I'd like to include it in my design. However, I want to experiment with this a little, and perhaps try different shapes of this indent to hopefully find something interesting. I'm going to be creating multiple copies of the blade part of the model and make different variations, so I can keep and switch between them as I please to decide the best looking one!
As to how I'm going to create the indent, however, I'm going to use some knowledge from 3DS Max transferred over to Maya: Booleans. While we haven't made use of this in the classes yet, I found booleans incredibly useful within 3DS Max and have managed to figure out how it works in Maya. While I feel that the tool isn't as developed as Max (at least, from what I know about it), it certainly does the job. ProBoolean in Max is really good though, and if I can find something similar in the future, I'll be a lot more comfortable with Maya. From my experience with the Maya boolean tool, it seems to be a little fussy when using one boolean after another, but I found just doing all of them at once alleviates this. I'll also be using this tool to create an indent design in the pommel, to make it seem a little more interesting. In fact, I'll probably do that first. I'll create a backup of the pommel because it can be hard to go back on using a boolean after deleting/losing history/undo.
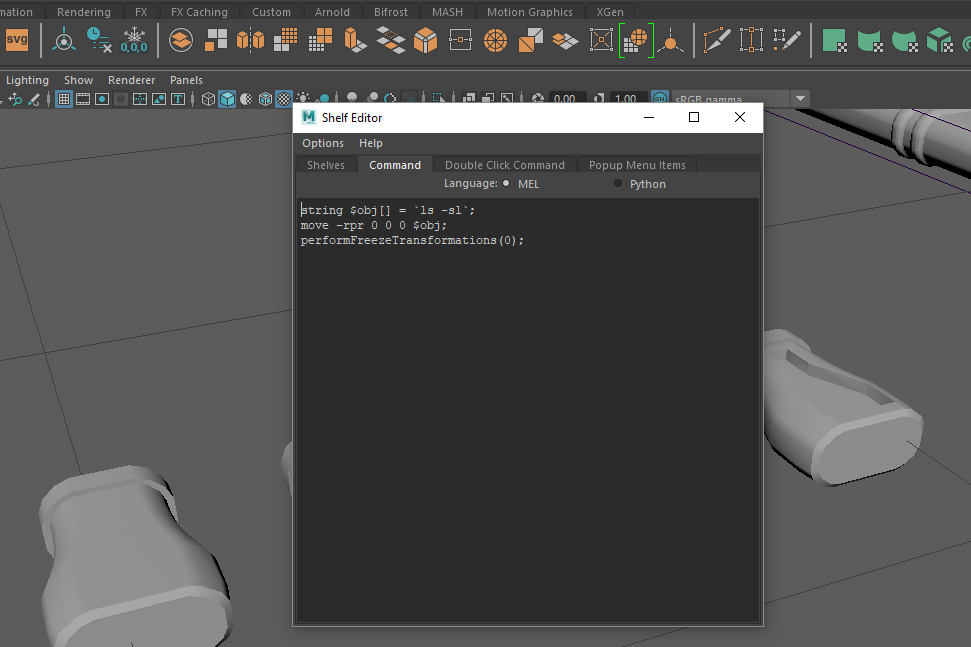
After creating a few pommel designs, I realised that the standard one was actually my favourite. It was worth experimenting, however, because I realised a problem with how Maya positions objects (or at least, something that gets in the way of my workflow). Within maya, the translate x,y,z in the channel box editor is not always based on the world origin. After doing some research, I found two methods. The first, was to make use of the 'Select field' to set the position of the object manually. Alternatively, I could make use of a custom script. I opted for the latter, as this let me create a shelf button that I could press to center the object to the origin of the scene in one click. It also taught me the basics of making custom MEL commands. I found the script online, and tried it out, and it worked! However, afterwards I had to manually press on 'Freeze Trasformations' as well. I decided to automate that, too, and add 'performFreezeTransformations(0);' to the script to run that when I press the shelf button. After a little bit of photoshop work, voila, I had my own shelf button! I saved the script and everything else to my external hard drive to make use of it in university, but I can still make use of the non-script method if I don't have access to my custom script. C
Can you tell which one is my custom shelf icon? It's the one on the right of the 'new in Maya 2018' icon!
Anyway! Now that yet another distraction is dealt with, I can go onto the blade and make it an actual XVIa sword!
Aaand the software crashed. Unforunately, Maya crashed on me while trying to undo a boolean change. I told you those things were fussy, but they're so so useful, it's worth it. Huzzah! Maya had a temporary backup. Even though I didn't lose much work at all from the last save, the temporary backup saves a bit more time, so that's good.
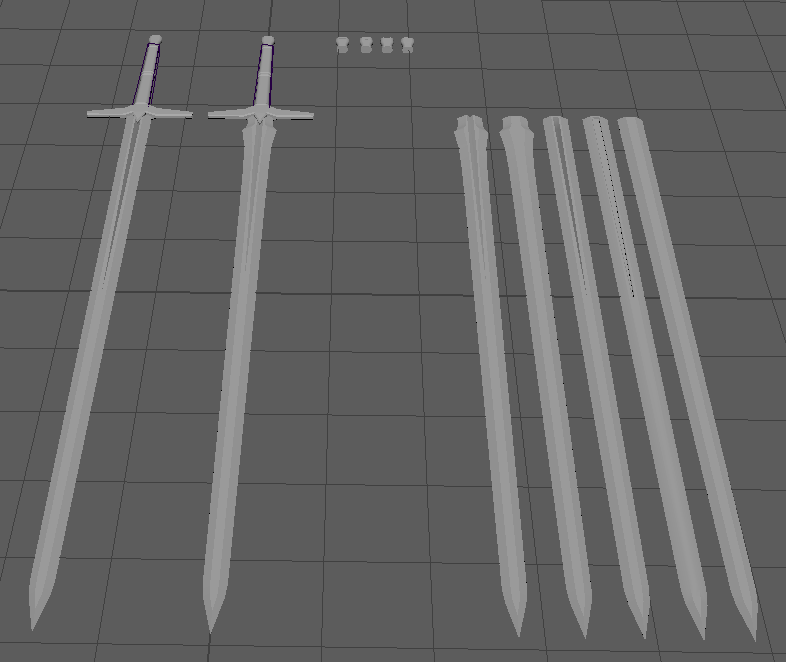
You may notice, the blades I've created are a little different. Well, specifically there's now 2 versions. The normal one with the idea I had before, and a slightly different version. The different version is actually the kind of blade I prefer in fantasy games, but you don't find this type of blade often in actual medieval games. I thought I'd create both, and perhaps expand on the sword to create a more 'fantastical' version for the mod later on.
Oh yeah! You might've forgotten the reason that I wanted to create this sword in the first place - it's to use in the future for a mod for the game Blade & Sorcery. That will mean, however, that I will have to UV and texture the model I have here. I certainly know how to texture the thing (Substance Painter, perhaps!), but creating the UVs, especially in Maya, is something I don't have as much experience with. For now, I'll consider this model 'completed'. I have some good variations I can use, and I have the detail that I was hoping for. You might see a part 2 of this post later in the blog, if I ever get around to the second part of this!
Note: Since the taking of the above picture I have shortened the swords, as they were a little long.

Comments
Post a Comment